So you did all the right things before and during the deer season to finally get a nice animal under your belt…. What’s next? Get a nice Picture of that animal!
We often see too many people who create such a great memory in the field, but forget how nice it is to have a good picture to reflect back on with. Yes it may take some premeditated planning and some “unnecessary time” but a nice picture of a deer is easier to put online for friends to see than it is to drive around with the actual deer or mount.
Acquire a good digital camera for photographing your deer kill
Digital cameras are a must for every hunter. They allow us to take hundreds of pictures on one SD card digitally, making storing images on a computer or posting images to the internet a breeze. Select a camera that has at least 5 megapixels for good quality photos. Check out some reviews on digital cameras here.
Select a proper background
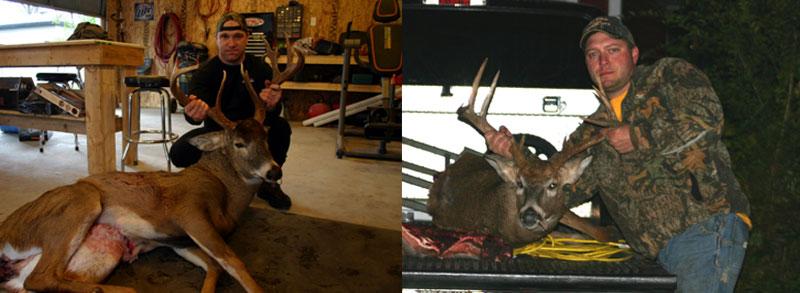
A quality picture of downed game will have a background similiar to the area where the animal was harvested. Many times you will see a picture of a beautiful buck taken on the tailgate of a truck or hanging in a garage; this is very unprofessional when judging picture content quality. Take the picture in the woods or the field you harvested the animal or, if that is not an option, drive to the nearest property that allows you to use the same type of background in the pictures. A little effort goes a long way.
Bad Backgrounds!
Execution of a high quality picture
1. Crop the picture
In the view finder or digital screen, close in on the subject so you are getting the hunter and the deer in the center.
Most cameras have zoom features which can make a picture look more professional by creating a blurred background while keeping the subject(s) in focus, but make sure you are not zoomed out beyond the optical zoom. The optical zoom is normally indicated by a vertical line shown somewhere on the zoom meter.
With proper cropping, you will ensure that the hunter and animal are the focus of the picture and not the the first 40 feet of the oak trees in the background!
2. Cosmetic checklist.
– Is the animal’s tongue in its mouth?
– Are you wearing the camoflague you were while harvesting the animal?
– Is your weapon included in the picture?
Taking a minute to make the above preparations will result in a great
looking shot!
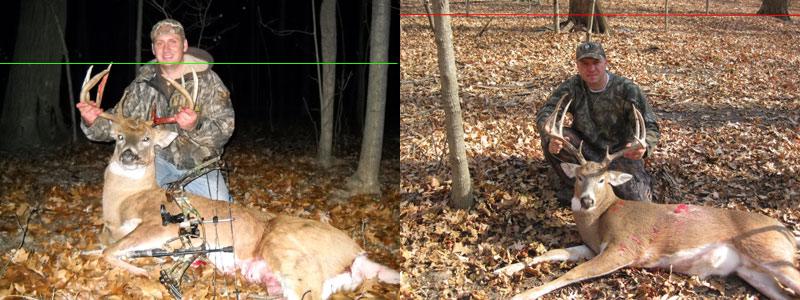
3. Take the picture between eye level of the animal and the hunter
The angle that you take the picture at affects the quality. By taking this “same plane” picture, you are capturing the best “front on” view that you can with no distortion from bad angles. The hunter also can hold the animal a little further away from his body creating the illusion that the animal is bigger than what it actually is.
Here are two separate pictures taken from different levels. Which do you think looks better?
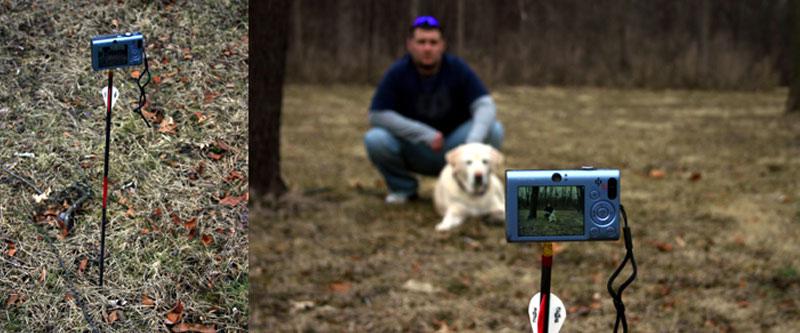
How to take a quality picture of yourself with an arrow and a camera!
1. Simply screw the nock of a fieldpoint arrow into the threaded tripod hole in the bottom of the camera.
2. Stick the arrow in the ground. Set the camera’s timer. Take the picture!
Take many pictures of many poses
With a decent memory card in a camera, you can normally take one hundred or more pictures if you wanted to. While we don’t suggest spending hours trying to capture the perfect shot, we do suggest you get at least 20 pictures with at least 3-5 different poses. What may look good to you on the cameras digital playback may not look good on a 20 inch computer screen. Improper cropping, out of focus subjects, poor exposure, and many other unnoticed imperfections at the time may occur so by taking a higher number of pictures, you better your chances for that perfect picture.
Good luck!


