If you are a deer hunter like me, chances are that you may have harvested a trophy at one time or another. What did you do with it? Well, one popular choice is to get the buck mounted. A shoulder mount is a popular yet expensive option. It is by far the most beautiful way to preserve your trophy but prices can range from $300-$700. Another option is to do a European mount. This display of the skull and antlers is also an attractive option and is less expensive than a shoulder mount. And then there’s the old “cut the skull plate and antlers off and screw it to a wall.” All these are options that many others and I have used but one thing is common with all of them; only those who visit your humble abode get to enjoy your trophies. Enter Trophy Stickers.
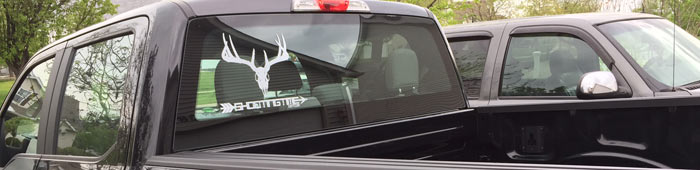
Trophy Stickers is a company that will make a beautiful version of your trophy’s skull and antlers in sticker/decal form for applying to your vehicle. With a sticker from Trophy Stickers, you can still have your deer mounted at your home but can show off your trophy wherever your vehicle takes you. Let’s take a look at how to get a trophy sticker made.
Ordering a Trophy Sticker
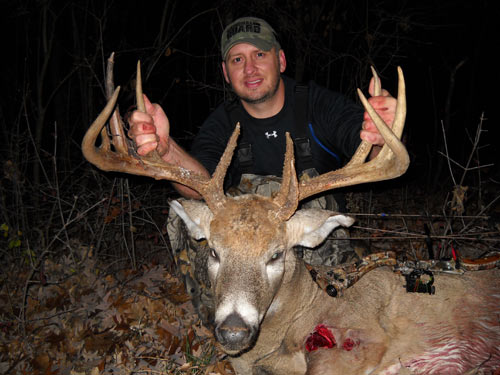
The first thing you want to do is to make sure you have plenty of photos of your trophy from many different angles. The more pictures you take, the more likely you’ll have at least one picture that the guys from Trophy Stickers can work with.
Once you have your picture, visit their website at https://trophystickers.com/ and start the ordering process. While placing the order, you’ll have options like size, color, and what text (if any) that you would like incorporated into the design. Complete the purchase and wait for your Trophy Sticker!
Installation of your Trophy Sticker
Once you receive your Trophy Sticker, it’s time to install it! Follow the following steps to ensure your Trophy Sticker is applied properly.
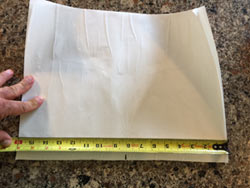
- Unpackage and unroll your sticker onto a flat surface. Make a horizontal or vertical marks onto the sticker that will help you with a properly oriented installation.
- Decide where you want to install the sticker and clean the window thoroughly.

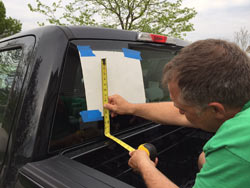
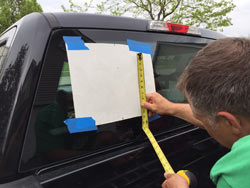
- Apply masking tape to the top and bottom of the Trophy Sticker and fix it to your rear window or wherever you plan on installing it.
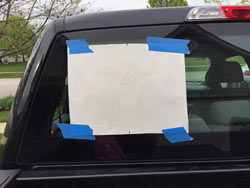
- Check to make sure the Trophy Sticker is being applied squarely to your vehicle. Get out the tape measure and check parallel measurements with your vehicle.
- Take off the masking tape from 1/2 the sticker and peel back the contact paper (masking tape like layer that the sticker is stuck to).
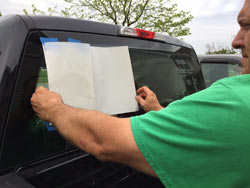
- Take a pair of scissors and cut the exposed base paper at about the center of the Trophy Sticker.
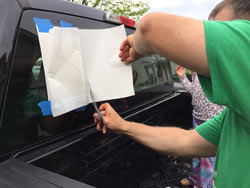
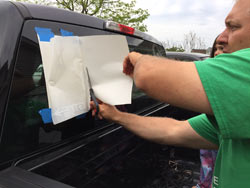
- Once the base paper is cut, roll the contact paper and Trophy Sticker back over and smooth it out as you go. (watch video below)
- Once half of the Trophy Sticker is applied, remove the remaining masking tape and remove the remaining base paper. Once the remaining base paper is removed, apply the rest of the Trophy Sticker. (watch video below)
Final Thoughts on Trophy Stickers
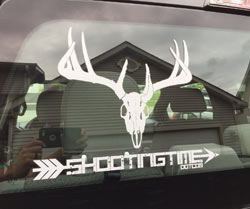 A sticker of your trophy from Trophy Stickers is an economical and beautiful way to display any trophy that you are proud of. Just visit their website, order your sticker and follow our installation tutorial for a beautiful option of sharing your trophy.
We were extremely impressed with not only the quality of the product but the artistic detail of the replication as well. As tech savvy hunters, we know that making a digital reproduction of a trophy like this is a tedious process so we can confirm that the price is more than reasonable. We recommend this product 100%. For more information, give them a visit at https://trophystickers.com.