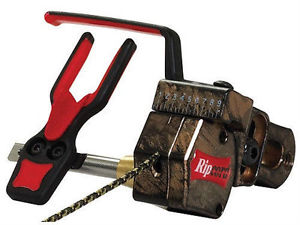
 The rest we are going to install is the drop away style rest. Drop away style rests eliminate fletching interference, rest tension settings and other factors which can impede reaching maximum efficiency with your bow. If installed correctly on a well tuned bow, the drop away rest is the best choice. If you are not installing a drop away style rest, you can still use some key principles on this page to ensure a successful setup.
Steps for installing an arrow rest
1. Examine your arrow rest’s parts
Remove the parts of the rest from the packaging and study the supplied instructions.
2. Attach your arrow rest to the bow’s riser
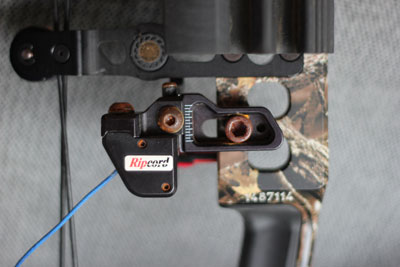
Attach the rest squarely to the riser by installing the berger hole screw and any additional set screws.
3. Set the arrow rest’s up position
With an arrow on the bowstring, manually pull the cord to bring the rest to the up position. Make any adjustments necessary to have the center of the arrow directly horizontal to the center of the berger hole.
Inspect the down position and make sure there is no contact between the arrow holding arm and the arrow shelf. If there is, you will have to move the rest towards the bowstring to eliminate this contact. If there is not enough adjustment and you can not achieve a solution to this problem you should install something to cushion the impact. Also, you may raise the rest up to an 1/8 inch off the center of the berger hole if that does the trick.
4. Set you arrow rest’s center shot adjustment
The center shot is the arrow rest’s left to right location. This should be set at a distance, recommended from the bow’s manufacturer, off the inside face of the riser.
5. Tie in the arrow rest’s drop away cord
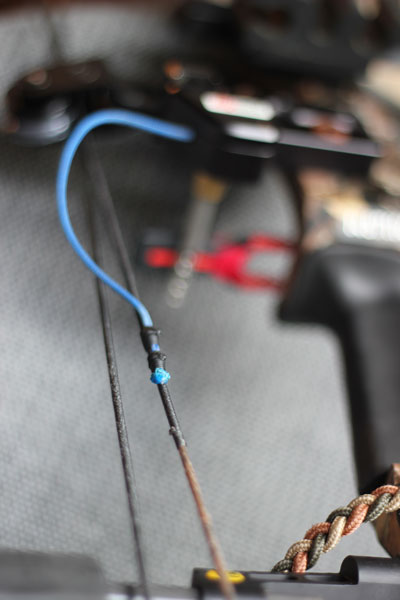
Snugly, but not tightly, tie in your drop away’s cord to your downward cable with a “setting knot” in an area which will not interfere with the upward cable.
6. Set your tie in point on the downward cable
Draw your bow back to engage the drop away rest. When the rest is in the up position during the draw you can continue to full draw if the cord was tied in snugly and not tightly. The cable will be able to pass through the knot and at full draw will establish the proper “tie in” location. When returning from full draw the knot, if snug, should hold in this desired location.
7. Finish tying in the drop away cord
You can now tighten the setting knot. Below the “setting knot” you can now tie in your finishing knot to the cord. Make sure this is done below the setting knot. Tie this in tightly and finish the knot with techniques in the “knot tying 101” link.
8. Apply the finishing touches
Trim any excess cord below the knots and while keeping the flame off the cable, melt the frayed end with a lighter. You can now draw the bow back slowly to ensure that the rest raises properly, but not prematurely, at full draw and that the knots are holding well.
Proceed with paper tuning for final adjustments.